Coloured Epoxy Coating

Bulk deal
Quantity Discount
1 $290.00
2 $285.00
3 + $280.00
Quantity
Clear

$290.00

Bulk deal
Quantity Discount
1 $290.00
2 $285.00
3 + $280.00
  • Cost From

    $4.98 per m2

  • Re-Coat

    14 - 20 hrs

  • UV Stable

    No

  • Coverage

    5-7m2 per ltr

  • Coats

    2

  • Equipment

    Roller

  • Dilution

    No

  • Clean Up

    Solvent

Features

  • 100% solids, solvent free epoxy
  • Easily roll applied with excellent adhesion
  • Long lasting and easy to maintain
  • Most durable and hardest wearing of epoxies
  • Excellent resistance to chemical and solvent spills
  • Cures at room temperature without blushing
  • Comes in a range of six different colours
  • Perfect as a base coat for a Decorative Flake Floor finish
  • Ideal for wet areas or garages with Clear Low Sheen Non Slip Additive

    Product Description

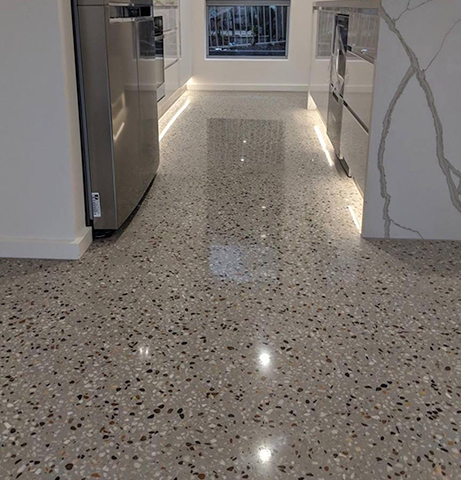
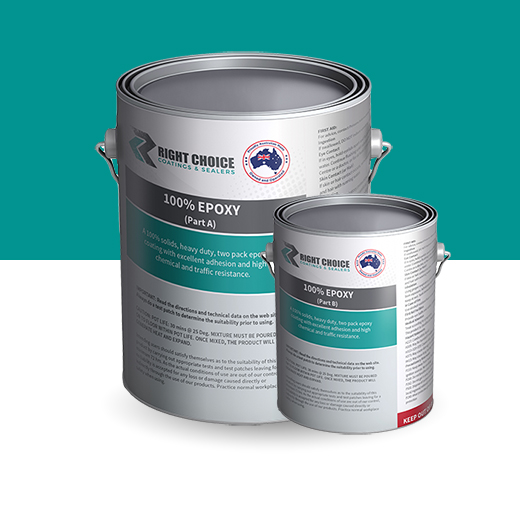
    Coloured Epoxy Coating is a solvent free, 100% solids, (3:1) heavy duty concrete floor coating that is easily roll applied. The Right Choice Epoxy Floor Coating has very good mechanical properties, making it long lasting and easy to maintain. It is also perfect to be used as a base coat for a Decorative Flake Floor finish.

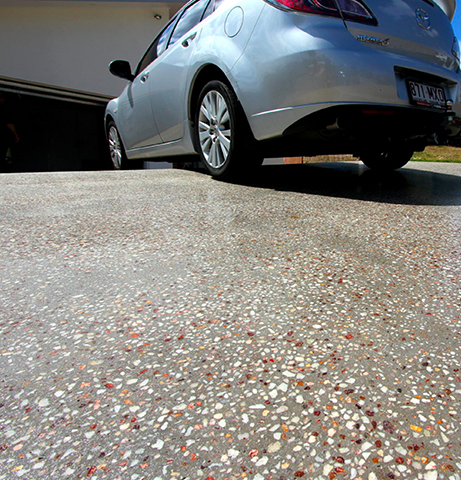
    This is the most durable and hardest wearing of epoxies with an excellent resistance to chemical and solvent spills. It cures at room temperature without blushing and is suitable for use in food processing plants, commercial properties, retail stores and residential applications. Coloured Epoxy will also accept the Right Choice Non Slip Additive, making it ideal for use in wet areas or as an Epoxy Garage Coating. Clean-up or thinning (if required) is with the Right Choice Solvent.

    Please ensure to check the colour of the sealer prior to installation. Once the product has been applied, Right Choice can take no responsibility for any discrepancies in colour variations.

    Colour Chart

    Beige
    Black
    Dark Grey
    Light Grey
    Mid Grey
    White

    Ideal For

    • Interior applications
    • Food processing plants
    • Commercial
    • Residential
    • Garage Floors
    • Wet areas

    Coverage Rates

    10 litres will do 2 coats over approximately 25m² – 30m² (concrete porosity dependent)

    Coverage rates will be determined by how porous the concrete is (how easily water soaks in). The easier and quicker that water soaks in, the more porous the concrete is and the more product you will use.

    Surface Porosity

    • Ensure the concrete has sufficient porosity for the sealer to penetrate.
    • Dip a finger into a glass of water and apply 2-3 drops to the surface.
    • Time the amount of time it takes for the water to soak into the concrete.
    • For sufficient porosity to apply a sealer, this should be no longer than 90 seconds.
    • Repeat the test over multiple sections of the concrete substrate.
    • If under 90 seconds then the concrete has sufficient porosity for application of the sealer.
    • If longer than 90 seconds, then it may be necessary to either acid wash or diamond grind the concrete to open it up and create the required porosity.

    Quantity Estimator

    Enter the dimensions of your surface area to estimate how many tins of product you may need:

    Summary Estimation
    0 tins
    * The estimated number of tins is based on the average coverage per square metre and is to be used as a guide only, as there are many variables when estimating (ie, porosity). Please ensure you check your calculations as Right Choice Coatings cannot be held responsible if the incorrect quantity.

    Information Guides

    1. Download: Technical Data Sheet
    2. Download: Preparation Guide
    3. Download: Application Guide
    4. Download: Troubleshooting Guide

    General Notes

    • Ensure to read the TECHNICAL DATA SHEET, the PREPARATION GUIDE and the APPLICATION INSTRUCTIONS thoroughly first.
    • It is recommended to do a test patch first to determine the suitability of the product.
    • Coloured Epoxy Coating is not designed to be applied to outdoor substrates. It is NOT UV stable.
    • Do not apply when the ambient temperature is below 15c or above 28c.
    • The substrate must be cool to touch before applying any sealer or coating.
    • Always follow the manufacturer’s guidelines for coverage.
    • Generally only two coats are required, however on a highly porous surface then a third coat may be necessary.
    • If your concrete is very porous or tight, then it is a good idea to thin the 1st coat only with up to 10% xylene thinners

    PREPARATION:

    Surface Porosity

    • Ensure the concrete has sufficient porosity for the sealer to penetrate.
    • Dip a finger into a glass of water and apply 2-3 drops to the surface.
    • Time the amount of time it takes for the water to soak into the concrete.
    • For sufficient porosity to apply a sealer, this should be no longer than 90 seconds.
    • Repeat the test over multiple sections of the concrete substrate.
    • If under 90 seconds then the concrete has sufficient porosity for application of the sealer.
    • If the water soaks in extremely fast (30 seconds or less), then it is advisable to apply Aqua Prime before an application of the base coat of epoxy.
    • If longer than 90 seconds, then it may be necessary to either acid wash or diamond grind the concrete to open it up and create the required porosity.

    Moisture

    • The substrate must be dry and free from any rising moisture.
    • Ideally use a concrete moisture meter to determine the moisture content. If this is not available, proceed using the method below.
    • To test for moisture, cut a piece of thick black plastic into 1m².
    • Ensure that it is free from any tears or pinholes (this would render the test useless).
    • Attach the plastic to a section of the substrate (repeat in other areas) & duct tape the edges.
    • It is important that the plastic is completely sealed around all edges and free from holes.
    • After 24 hours, remove the plastic. If the concrete has darkened or there is condensation under the plastic, then the concrete is not sufficiently dry to apply a sealer or coating.
    • If the substrate is not dry enough then either wait a few more days & repeat the test or it may be necessary to use a concrete moisture barrier. Contact Right Choice for advice.

    Contamination

    • All substrates must be clean and free of contamination i.e. oil, grease, bird droppings etc.
    • Many of these contaminates are easily removed using the Right Choice Concrete Cleaner.
    • In some cases it may be necessary to use a concrete grinder or a light acid wash.
    • Basically, if water does not penetrate through the contamination then neither will a sealer or a coating.

    Acid Etching

    • If required, the concrete can be lightly acid etched prior to sealing. This will help to create a more porous substrate.
    • Use extreme caution and safe handling methods when using hydrochloric acid.
    • Before acid etching, make sure the concrete is cleaned properly of all contaminants, oil, grease and dirt by using the Right Choice Concrete Cleaner (mix @ 50:50 dilution with water), paying extra attention to heavily contaminated areas.
    • Rinse the Concrete Cleaner off thoroughly with clean water.
    • Dilute the hydrochloric acid with water at a rate of 1 part acid to 10 parts water. CAUTION! Always add the acid to the water, not water to acid.
    • Lightly dampen the surface so that the concrete is slightly wet but not puddling water.
    • Apply the diluted solution evenly to the surface using a watering can or similar.
    • Allow the acid to bubble on the concrete for up to 15 mins.
    • Once the bubbling has ceased, thoroughly rinse the surface off with clean water (abide by local laws for disposal).
    • Neutralise the surface using the Right Choice Concrete Cleaner (mix @ 50:50 dilution with water, highly alkaline). Brush the mixture into the surface and allow it to sit for 5-10mins before rinsing thoroughly with clean water.
    • Allow the surface to dry for a minimum of 24 hours (weather dependant).

    *Note – If neutralising is not done correctly, acid etching can leave a white powdery residue, (calcium carbonate) on the dried surface. This is a fine white dust which can cause problems with adhesion and delamination of the coating. Once neutralising is complete, check the entire surface of the concrete. It should have a uniformed texture similar to medium grit sand paper (If not, repeat the above process). Sprinkle a few drops of water over the surface and If all the water is quickly absorbed, the surface is sufficiently oil and grease free. If the water still beads up (even if only in certain areas), then further preparation as above will be required.

    APPLICATION:

    Mixing

    • Coloured Epoxy Coating should be mixed at a ratio of: 3 parts A to 1 part B
    • Pour the tint pack into “part A” and mix thoroughly.
    • Once mixed, slowly pour “part B” into “part A” while still mixing. Mix for approximately 2 minutes using a slow speed drill and squirrel mixing paddle. Allow to stand for 1 minute & then mix again for 1 minute.
    • Only mix enough epoxy that can be used within 25 minutes.

    Applying the 1st Coat

    • Always wear the appropriate personal protection equipment.
    • Coloured Epoxy Coating should be applied using a 10mm – 12mm nap, lint free roller cover.
    • Immediately pour the epoxy onto the substrate in ribbons.
    • Do not leave the epoxy in the bucket as it will go off much quicker.
    • Use a new bucket for every new batch that you mix.
    • Never mix a new batch in a previously used bucket as this will accelerate the setting time of the epoxy and you decrease the working time dramatically.
    • Spread the epoxy with a squeegee or roll out roughly to achieve the correct m² per litre.
    • Once the spread rate is achieved, gently “tip off” the epoxy with the roller and move on to the next section. This will allow the epoxy to self-level.
    • The more times you roll it, the more chance there is of it going off too quick and getting roller marks.
    • Ensure to keep “wet edge” of the epoxy to avoid any overlapping marks or roller marks.
    • Allow 16 – 24 hours drying in-between coats (weather dependent).

    Applying the 2nd Coat

    • Lightly sand the first coat using a sander or sanders pole with a 180# sandpaper. If the epoxy produces a fine dust it is dry enough to sand, however if it is clogging up the sandpaper then you will need to wait longer for it to cure.
    • Thoroughly vacuum the first coat after sanding and remove any dust particles etc.
    • Apply the second coat in the same manner as above.
    • Once the second coat is finished, allow a minimum of 24 hours drying time before walking on and 10 days before driving over.
    • The more air flow and warmer conditions, the quicker the epoxy will cure. Colder conditions and no air flow can cause a lengthy delay in the epoxy curing.

    *NOTE: Epoxy has a 7-10 day full cure through rate. Please exercise caution when sitting furniture on, sliding boxes etc and walking on in this time frame. DO NOT DRIVE ON FOR A MINIMUM OF 10 DAYS.

    Specifications

    Product Name: Coloured Epoxy Coating

    Material: 100% solids epoxy coating

    Pack Sizes: Part A = 7.5 L & Part B = 2.5 L (Mix 3:1 by volume)

    2 reviews for Coloured Epoxy Coating

    1. Simon Wright

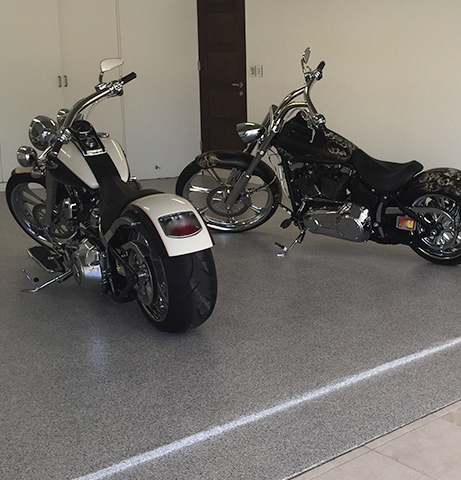
      I used the light grey in my home garage and now it looks like a professional work shop 🙂

      Helpful?
      1 1
    2. Andrew

      Had a few roller lines but i’m not a professional so probably just my fault. It still looks much better than it was and was very easy to use.

      Helpful?
      0 0
    Add a review
    Review our product to get a chance to receive coupon!

    Your email address will not be published. Required fields are marked *